Creates the ECS in the new zone in the same region
Releases the ECS in the original zone and images created during the migration
This tutorial is relatively straightforward and only involves three steps, so let’s begin!
Step 1: Backup the Original ECS
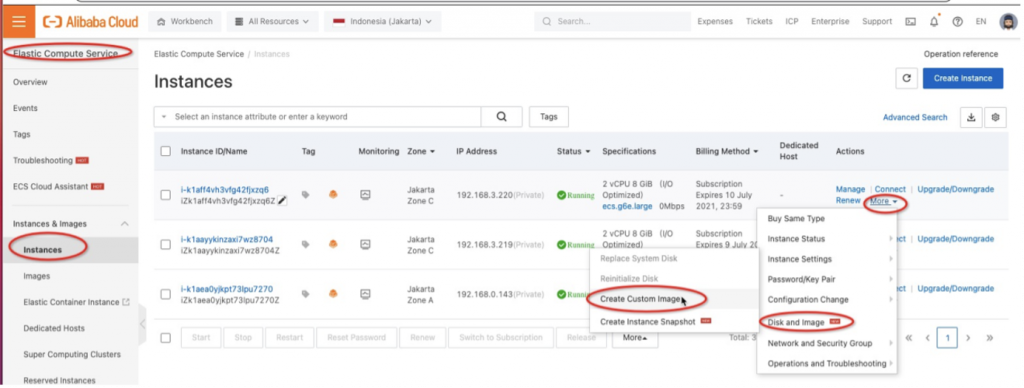
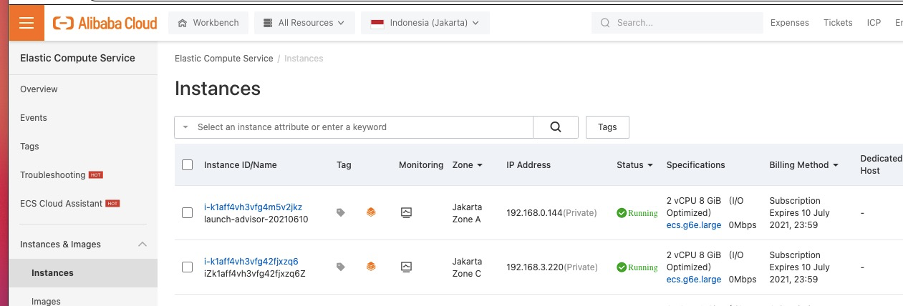
Find your ECS Instance via Elastic Compute Service > Instances
Navigate to Create Custom Image via selected instance > More > Disk and Image > Create Custom Image
Online backup is always working, but we recommend stopping your instance before clicking Create Custom Image for complex software installation.
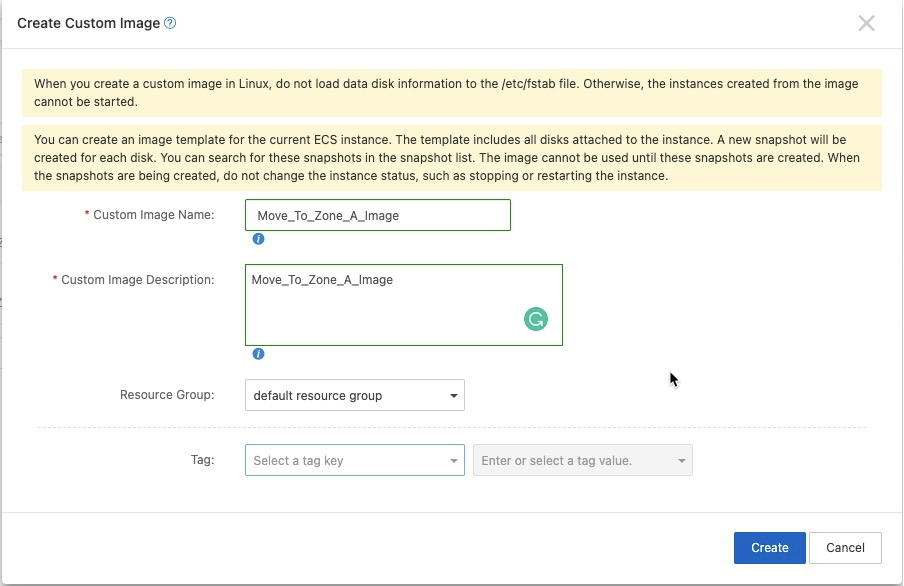
Fill in the necessary data to create the custom image on your selected instance
Custom images are created from instances or snapshots or imported from your local device. You can create a custom image from an ECS instance to have applications deployed and then use the custom image to create identical instances. This eliminates the need for repeated configurations.
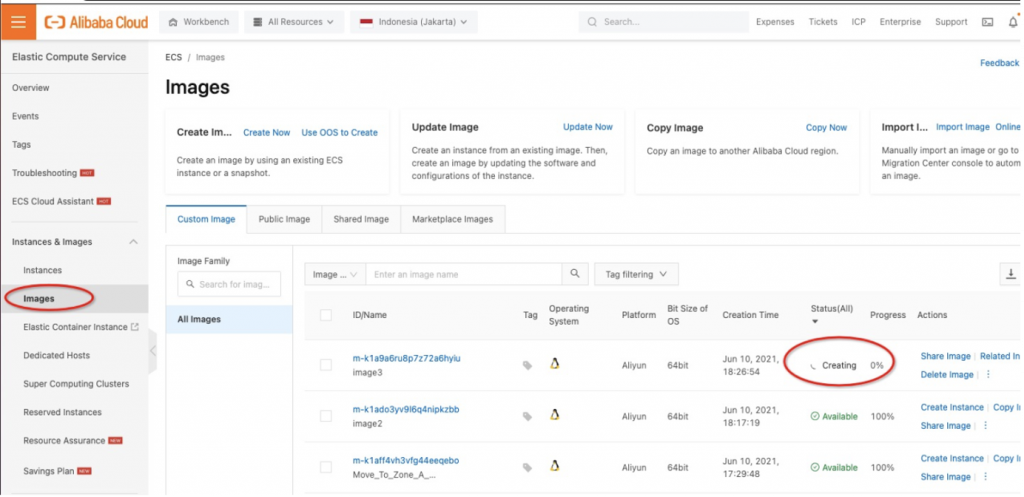
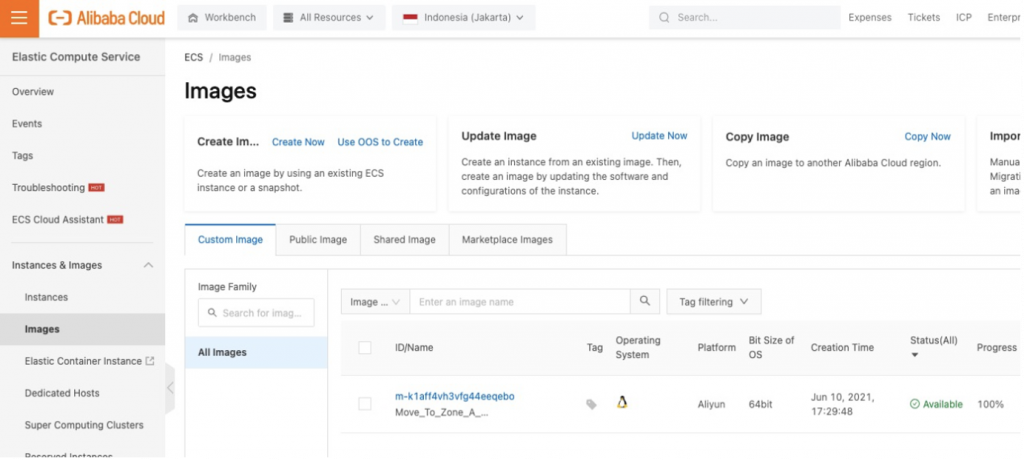
It may take a few seconds for the image to be created. You can monitor the progress via Images, but you may need to refresh the page to check the latest status.
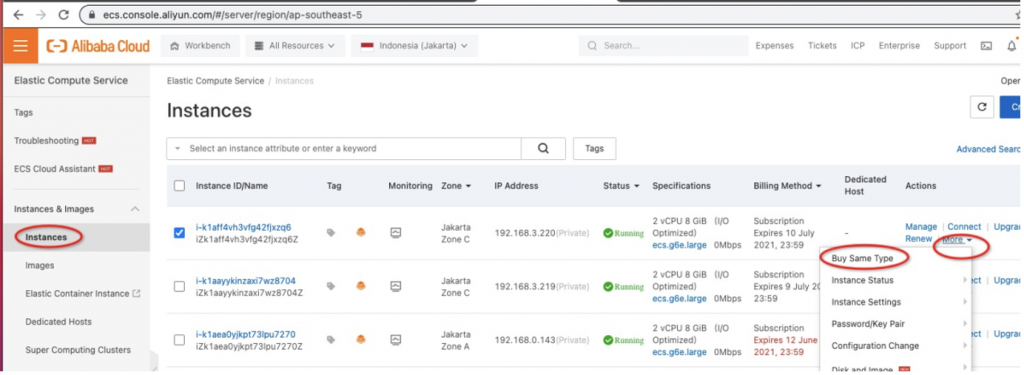
Step 2: Create the New ECS
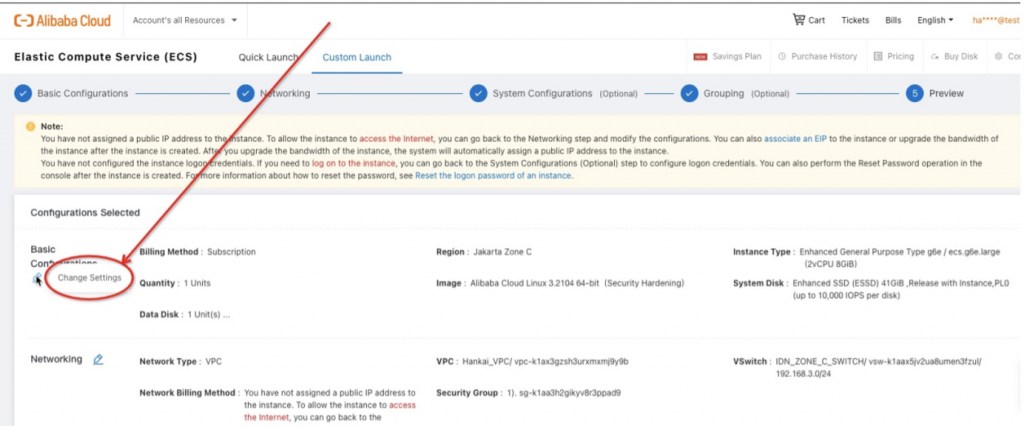
Select Buy Same Type after More on the original ECS
Click Change Settings under Basic Configuration
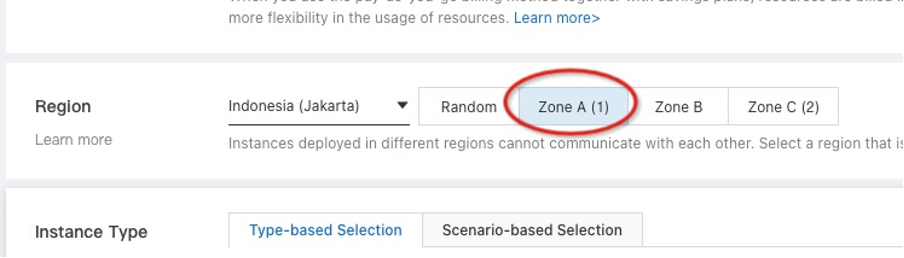
Select the new zone for the new ECS
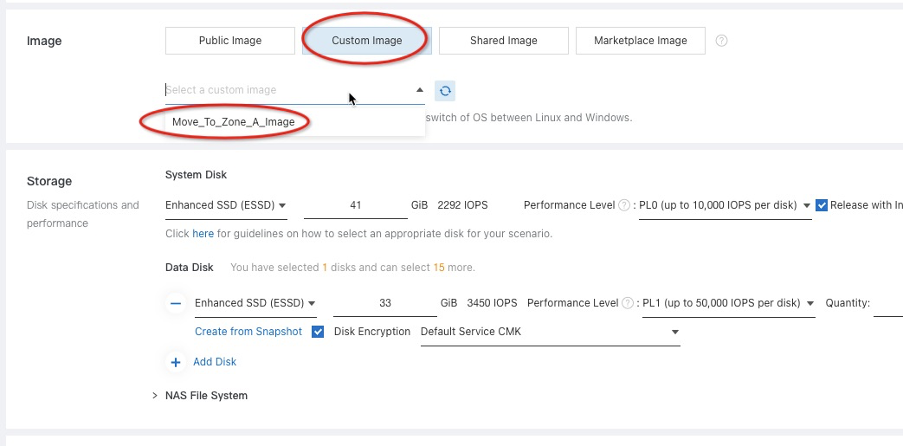
Select Custom Image and select the image created in Step 1
If you can’t find the image, it means the image creation is not completed yet.
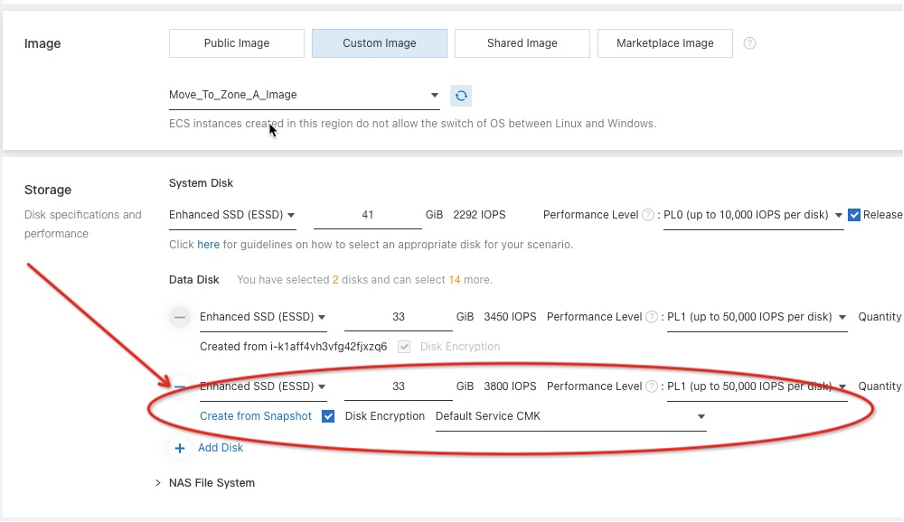
Note: If there are Data Disks attached to your original ECS, the data disks will be duplicated. You will need to remove the new disk (without snapshots) to create.
The first Data Disk comes from the Move_To_Zone_A_Image, while the second Data Disk appears since we selected Buy Same Type.
Click Next and set/update other configurations if needed
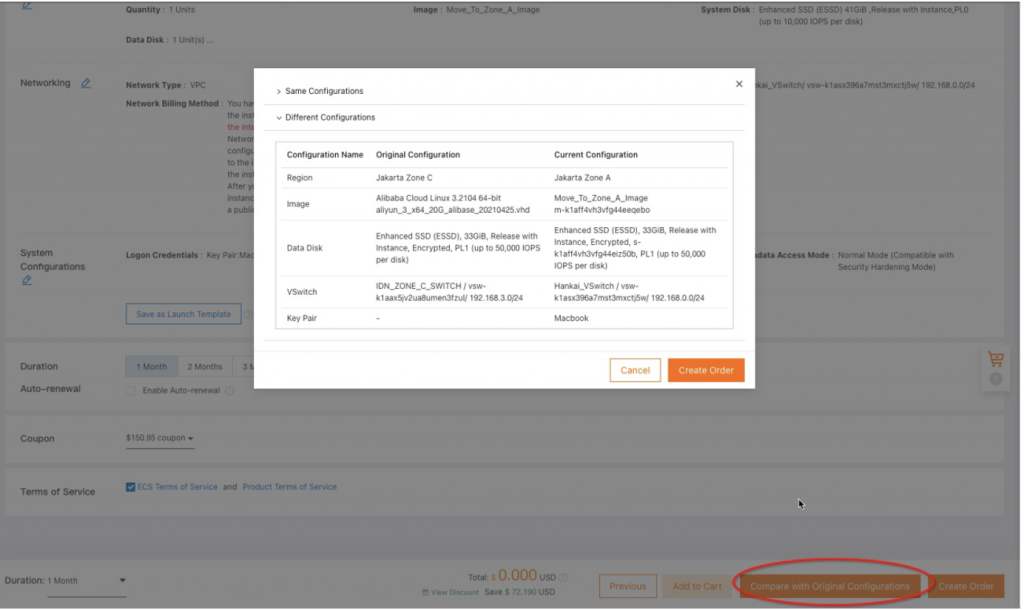
Compare with Original Configurations to make sure there is no mistake during configuration
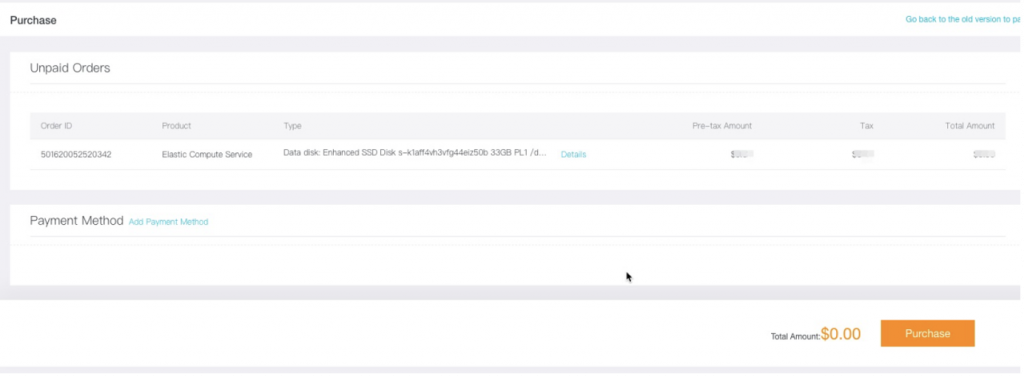
Create Order will bring you to the Purchase Page
Step 3: Cleanup
Once the new ECS is tested, running, and working for a while, you can consider releasing the original ECS and deleting the migration custom image to save costs.
Note: In some cases, you may not be refunded when releasing the ECS. Please see this link for more information